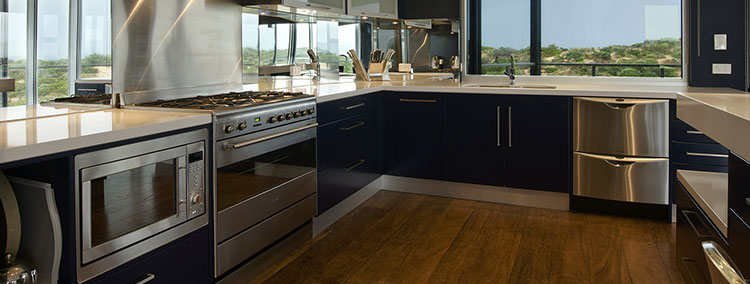
Month: June 2020

Cooktops Repair: Common Cooktop Problems And How To Fix Them

According to cooktops repair professionals, cooktops develop problems like any other kitchen appliance. The most common problems being:

Failure of the cooktop to turn on

You can’t cook on a cooktop that doesn’t turn on, can you? So when you switch the unit on and it doesn’t work, you should move with haste and restore it.

In most cases, the cooktop will fail to turn on when you haven’t properly plugged it in. Before you think of any other reasons why the unit isn’t working, first confirm it’s properly plugged in.

If it’s plugged in but still not working, check the outlet and confirm it’s not defective. You can use a multimeter to test or use any other small appliance such as blow dryer or iron. If all of these fail, hire an electrician to help you out.

It’s common to find an appliance providing power but still the cooktop isn’t working. This might be a problem with the internal components. If you don’t have the skills, let an expert take a look at them.

Damaged electric coils

It’s normal for the electric coil burners to wear out especially if you frequently use your cooktop. Signs of damage include: bubbles, cracks, and blisters on the coils. Coils are irreparable so when they develop problems, you should replace them.

When buying new coils, buy those of the right size as loose coils often result to plenty of cooking issues and put your property at the risk of fire.

Cooktops create sparks when you turn them on

A properly functioning electric cooktop shouldn’t spark the same way as a gas cooktop so if your electric cooktop is producing sparks before its lit, you have a problem you need to address as soon as possible.

Electric cooktops produce sparks when the heating element is damaged. The element can be damaged by plenty of things including excessive weight and temperatures.

Your cooktop will also produce sparks when you have loose wire connections around the electric coil burners. These sparks are extremely dangerous and a potential source of fatal electric shock so when you notice them, fix your appliance as soon as possible.

Failure of electric coils to heat

Traditional electric cooktops have electric coil burners that heat when you turn the appliance on. If your cooktop is receiving power but the coils aren’t heating, you have a problem in your hands you need to address fast.

This problem often comes about due to a loose connection between the coils and cooktop and this happens when you clean the coils and fail to return them the way they are meant to. As a result, they don’t receive power.

You need to inspect them and ensure they are in their right place. Also confirm there is nothing stuck between the coil elements and stove.

Your coils will also fail to heat if you have an issue with the cooktop’s ignition switch that provides the action necessary to heat the burners. Unless you have the necessary skills, this can be a complex problem to fix on your own.

Problem adjusting the temperature of the burners

One of the main reasons homeowners invest in cooktops is because they provide precise temperature settings. Unfortunately, the appliance develops problems and you can’t adjust the temperature of the burners hence you can’t take advantage of the features the appliance comes with.

You might have a problem adjusting the temperature of the burners when you have a problem with the unit’s infinite switch. The switch is connected to the dial that regulates the power levels and a faulty switch that can force the burners to heat to only a specific level regardless of the settings.

This problem will also come about when you have a faulty internal ignition switch.

Regardless of the reason you can’t adjust the temperature of the burners, contact an experienced professional to help you with the diagnosis and fixation of the problem.

Parting shot

These are some of the problems your cooktop can have. If you have the skills you can attempt to fix some of the problems, but if you have tried everything within your knowledge level and still the problem doesn’t go away, let an expert appliance repair Northern VA professional handle it.

The post appeared first on Express Appliance Repair

Does Cooking Food Kill Coronavirus?

The short answer is: yes. The longer answer is: it really shouldn’t be a concern.

Biology Matters

There have been no cases of COVID-19 associated with food ingestion. And while doctors and scientists continue to learn about this disease, it is highly unlikely that we will discover that you can contract it from the food you eat. Whatever you put in your mouth is immediately subjected to the digestive process designed to convert it into usable nutrients and waste. If the coronavirus were present on the surface of your food, it would almost certainly be killed by your stomach acids. In the unlikely event that it survives that onslaught, it would then enter into your intestines, and then out of your body. There is no pathway from your stomach to your lungs. Theoretically, there is the possibility that it could move from the mouth to the larynx and thereby into the lungs, but there has never been a case where that happened. COVID-19 needs to enter the respiratory system in order to produce the disease, and given the nature of human biology, the food you eat cannot cause the illness.

Cooking Helps Too

Because COVID-19 is so new, there is no settled science about the heat needed to kill it. However, the SARS virus (a close relative to COVID-19), is inactivated at 133ºF to 149ºF. Given that nearly all cooking is done at temperatures above 300ºF, it is reasonable to assume that COVID-19 would be killed in the cooking process as well. Again, though, it ought not to matter since your body would deal with the virus in the course of normal digestion.

Kitchen Hygiene – Fresh Produce

Just as you should have been doing before the COVID-19 outbreak, you should wash your fresh produce before using it. It is sufficient to use clean running water; you don’t need to (and shouldn’t) use any kind of cleaner on the produce. Leafy greens can be submerged in cool water then run through a salad spinner or dried with paper towels. Sturdy vegetables (like root vegetables) can be scrubbed with a vegetable brush under running water. Delicate produce (like raspberries) can be cleaned by hand under gently running water.

Kitchen Hygiene – Clean Surfaces

More important than the food you consume is the environment in which that food exists and is prepared. Now more than ever, it is essential to keep your kitchen clean. Use any standard surface sanitiser to clean your counters, and do so frequently. Be mindful of where you’re putting your grocery bags when you return from shopping, and clean those surfaces thoroughly before using them in food preparation. The risk of transmission from packaging is very low, but again, it’s an easy thing to wipe the counter after taking the pizza out of the box.

Kitchen Hygiene – Washing Hands

Washing your hands before you begin cooking should be part of your usual kitchen routine. Now, it may be wise to wash your hands more frequently while you prepare food. After washing the vegetables, wash your hands. After wiping the counter, wash your hands. It can’t hurt, and we know that hand washing is the most effective weapon in the prevention of COVID-19.

COVID-19 is very frightening, but it’s good to know you don’t need to worry about preparing, cooking, and eating your food.

The post Does Cooking Food Kill Coronavirus? appeared first on Dave's Appliance Service.

Appliance Repair During Quarantine: Safety Precautions to Take

You don’t really understand how vital your appliances are to your quality of life until one breaks down. And during the recent lockdown, people have been using their stoves, dishwashers, washing machines, etc. even more than usual. If something goes wrong, you want it fixed right away. At Dave’s Appliance, we have been open throughout the lockdown as an essential business, and we have made safety precautions part of our repair routine. In this post, we’ll share what we do, and what you can do, to keep yourself and your family safe during an appliance repair in your home.

What We Do – No Exposed Employees

If any of our employees have any symptoms of COVID-19, we encourage them to get tested immediately. They also stay home for 14 days. If any of our employees are informed that they have been exposed to COVID-19, they stay home for 14 days whether or not they have any symptoms.

What We Do – Masks

Whenever we come into a home to do a repair, we wear masks. Masks are designed to protect those encountered more than those wearing them. So wearing a mask is a mark of our respect for our customers. We don’t want to introduce disease into your home.

What We Do – Hand Sanitizer

We have hand sanitizers in our vans; we have hand sanitizer on our persons. We use hand sanitizer before entering your home, and we use it again if the repair takes a while. Hand sanitizer has been demonstrated to kill the COVID-19 virus effectively.

What We Don’t Do – Gloves

At Dave’s Appliance we have chosen not to wear gloves. If they aren’t immediately taken off after every encounter, they can become a source of transmission, and “[g]loves can be a source of contamination if they are not removed properly” (Wisconsin Economic Development Corp). Also, repairing appliances requires a lot of fine manipulation of various mechanical parts. Wearing gloves inhibits our ability to actually do our job quickly and well.

What We Do – Social Distancing

Everybody at Dave’s Appliance is fully committed to social distancing. We will do our best to enter and leave your house without coming within six feet of anyone in your family. When following you to the appliance, we will stay well behind you. When we are working on the appliance, we will announce it if we are going to move out of the vicinity for any reason, giving you notice so social distancing can be maintained.

What You Can Do – Social Distancing

When someone from Dave’s Appliance appears at your door, you can open the door and then move far enough away so that social distancing is maintained. If you can direct us verbally to the room where the appliance is, please do so. If you need to show us, remember that we won’t be right on your heels. It’s best if you and any other members of your family can stay out of the room where we’re working on your appliance. If that’s not possible, do your best to stay six feet away from our repairman.

What You Can Do – Clean Surfaces

It shouldn’t be necessary, but if you are concerned, you could wipe down any surfaces that our repairman has come in contact with after we leave. That would mean any door handles that we may have touched, and of course, the appliance itself. Again, because of our precautions, this step isn’t strictly needed, but you’re certainly welcome to do it if you’re worried.

You shouldn’t struggle along without a functioning stove or washing machine because of fear of COVID-19. With reasonable precautions, Dave’s Appliance has been fixing appliances throughout this time. We can fix yours too.

The post Appliance Repair During Quarantine: Safety Precautions to Take appeared first on Dave's Appliance Service.

Are You Dealing with Stinky Ice? Learn Four Possible Reasons It Does Not Smell or Taste Right

Are You Dealing with Stinky Ice? Learn Four Possible Reasons It Does Not Smell or Taste Right

If the ice coming out of your ice maker does not taste or smell right, do not assume that you have to replace the ice maker. While this might be what needs to be done, there are other potential reasons it could smell. Read on to learn what they are and then contact American Appliance Repair at 800-640-9934 if you need help from appliance repair experts.

  1. The Ice Has Become Stale
  2. Many people have no idea that if they do not use their ice maker for a period of time, it can get stale. When ice sits in the freezer for weeks or months at a time, it can absorb the odors in that freezer or even from the fridge. If you need ice and have not used any for a few weeks or more, consider dumping it out and making new ice.

  3. Your Water Filter Needs to Be Replaced
  4. If you notice your water not tasting or smelling right, one of the first things you should do is check to see if you need to replace your water filter. If it is older and has become clogged with debris and other particles, then it might not be able to screen out contaminants. If the water is impure, then the ice it makes is likely to have a bad taste and be impure too. Most refrigerator water filters only need to be replaced every six months or so, but if you use a lot more water than average, you might need to replace it sooner. Likewise, if you have hard water, then your filter may get clogged more easily.

  5. Your Filter Has Become Exposed to Food in Your Freezer
  6. Do you have stinky food in your freezer? Old ice can absorb food odors and get a bad taste. The ice does not have to be old though, if the food within the freezer is stinky. This is why you should completely wrap and cover your freezer food. If you do not, then it could be giving off a smell that is getting into your ice.

  7. Your Water Supply is Poor
  8. It could be that there is an issue with the water supply to your entire home. Some minerals, deposits, and impurities can get into the pipes and give your water a bad taste. You might notice it at first when you are drinking, but freezing it can concentrate the bad odors and flavors.

If you are worried that there is something wrong with your fridge or freezer, or you need your water filter changed, remember that American Appliance Repair at 800-640-9934 is here to provide all the help you need. We are looking forward to helping improve the quality of your water and ice.

The post Are You Dealing with Stinky Ice? Learn Four Possible Reasons It Does Not Smell or Taste Right appeared first on American Appliance Repair.

Washing Machines: Which Brands are Best

We recently read an article by Yale Appliance comparing the new GE Frontload washer with the Electrolux Front Load Washer. They mention quite a few appealing features of both brands. The thing that stuck out most to us, though, was later in the article they have a comparison chart about the reliability of various appliance brands for frontload washers for both 2019 and 2020 based on their experience of both selling and servicing specific brands. They calculated the service ratio for each brand based on the number of washing machines purchased of each brand divided by the number of serviced machines of the same brand. According to their research, Whirpool won the lowest service ratio for 2019. GE took the win for 2020 so far, but they acknowledge that it is insufficient data as the product is brand new and only been available for approximately six months.

In our own experience, we have seen the best success with Samsung washing machines. However, we decided to do some more digging and see what other studies have shown. Here’s what we found…

Good Housekeeping

Good Housekeeping drew the same conclusion as Yale Appliance with the GE Appliances UltraFresh Front Load Washer with OdorBlock rated as the best overall washer. They reported, “In our tests, the drum and door seal were bone dry after a full vent cycle. We found the wash cycles speedy and very effective, impressively cleaning our cotton and polyester test stain swatches in warm and cold water.  Even the quick wash removed a set-in stain in just 20 minutes.” However, they also tested the Kenmore Elite Top-Load Washer with Steam and Acela Wash and rated that as the Best Value Washing Machine.

Bestproducts.com

Best Products had a different winner, with the LG WM3900HWA 4.5-Cubic-Foot Front-Loading Machine taking the “Best Overall” vote. In their testing, they found that not only is this LG washer both quick and great at removing stains, but it is also currently ranked as number one by the American Customer Satisfaction Index ratings for both product and service quality. Additional pluses they mentioned was it being easy to operate, allergy-friendly, and energy-efficient

Best Products’ “Best Budget Buy” award went to the Samsung WF42H5000AW 4.2-Cubic-Foot Front-Load washing machine. An obvious plus they mention for this one is its affordability. However, they also note that, like their LG winner, this Samsung washer is also energy-efficient and easy to use, not to mention that it is stackable for those with limited space options. 

Wirecutter

For all of the same reasons mentioned by Best Products, Wirecutter also went with the LG WM3900 as their overall winner in their washer product testing. Wirecutter also makes note of this washer being more gentle than most. 

Their runner-up was the Electrolux EFLS627U, primarily for its stain-fighting abilities. This washer is also one of the few that allows you to reverse the direction of the door, allowing for more options in where you place it.   

When it comes down to it, there are a number of fantastic washers available out there today that are equipped with modern technology and are both highly functional and reliable. Ultimately, by familiarizing yourself with what we’ve covered here, you should have a better idea of what option(s) will be best for you and your life circumstances. No matter which washer you choose, though, Sarah’s Appliance Repair is here to help keep up the maintenance, and, when necessary, take care of any repairs you might need. Just give us a call at 505-835-1927 or head over to our scheduling page to set up an appointment!

The post Washing Machines: Which Brands are Best appeared first on Appliance Repair New Mexico.

Average Refrigerator Temperature

Refrigerator Temperature

A refrigerator is simply a blessing in disguise for anyone who proudly owns it. There can be a situation where you prefer to eat that extra pizza slices for the next day while watching your favorite movies. This electronic device will be your ultimate savior without a shadow of a doubt in that case.

Other than storing your foods in order to keep it fresh, you must know the average refrigerator temperature of your fridge. This will help you to keep track of your beloved foods and their freshness with time.

So, from the following article, you will get the information of the basic temperature of your refrigerator that can keep your food perfectly safe from getting rotten.

Read on to find out more.

Ideal Temperature of a Refrigerator

You should keep the temperature within 35 degrees Fahrenheit (35°F) to 38 degrees Fahrenheit (38°F). This given range will make sure that no bacteria starts growing onto your food and the freshness can remain intact till the time you consume it.

Besides, you will be protected from any kind of physical harm (stomach aches, diarrhea, etc.) that you might have faced if you have eaten the rotten ones.

Way to Measure the Temperature

Nowadays, the majority of the refrigerator comes with a fixed temperature system that you can easily keep track of as time goes by. If your one doesn’t have that, no problem! Follow this process to get the job done smoothly.

First of all, you can buy a refrigerator thermometer from any electronic store. After that, take off the covering and gently put the device onto the top shelf of the refrigerator. Close the door and give it some time (a couple of hours) to get the accurate reading.

One thing you should remember and that is to adjust the settings of the temperature control before you put the device. If your thermometer is good, you will surely get an accurate reading and it will be within the range of 1 to 2 degrees Celsius or 33.8 to 35.6 degrees Fahrenheit.

Final Tips

Here are some of the tips that will turn out to be highly beneficial for anyone who will precisely follow this.

• You can store the food at room temperature up to a maximum time of two hours. Don’t exceed that or else the food will start forming bacteria’s all around it, unfortunately. So, refrigerate as soon as possible.

• If you have hot food that needs to be refrigerated, don’t put it instantly in the freezer. Give it time to cool down to the room temperature and then store it safely. Putting hot food inside immediately will cause the cooling temperature to drop down and this might cause other foods to get spoiled. Just be careful in this kind of scenario.

• Check the door of your refrigerator whether it is locking perfectly or not. If a gap remains, some of the cold air will escape and this will drop the temperature down.

• Make space for all the foods so that the temperature can reach them properly. Avoid crowding the area and let the cold air circulate easily.

• For repair purposes, you should definitely reach out for help if you are unable to solve the problem. Simply type ‘appliance repair near me’ in Google and you will find all the service providers near your location.

Conclusion

Hope this article has managed to solve your queries successfully.
Take notes if you find some of the points are important.
Have a nice day!

 28 total views,  6 views today

The post Average Refrigerator Temperature appeared first on Appliance Masters Repair Service.

Learn How You Can Find the Water Filter in Your Refrigerator or Freezer

Learn How You Can Find the Water Filter in Your Refrigerator or Freezer

If your fridge makes ice and/or
dispenses cold drinking water, then it has a water
filter
. This water filter is necessary to keep the fridge
offering up the ice and water you need and ensuring that that water
is clean and safe. These filters are designed to help you, but they
do not last forever. They should be changed as often as every three
months or just once per year, depending on the model you have.

We know that some clients have a hard
time figuring out where the water filter is. This is understandable,
as there are actually many different places it could be installed. If
you need our help, call American Appliance Repair at 800-640-9934 and we can replace it
for you. Otherwise, keep reading to determine where your water filter
might be.

Start by Looking at the Manual

We know this seems like an obvious
suggestion but the truth is that many people forget to do so. Your
fridge’s
instruction manual
will likely have a diagram with information
about all parts – including your water filter. It might also tell
you what type of filter you need to replace it and how to do so. If
you do not have the manual, search for it online.

Check a Filter Changing Guide

There are many online filter changing
guides you might be able to find. There might be a video or other
online resource that shows you just where the filter is located and
how to change it. In these cases, you will look up the right resource
based on the brand and layout of your refrigerator. For example, you
would likely search three-door, top-freezer, or side-to-side freezer.
Note that most brands have a few potential locations of their filters
but you will get a starting point.

Check the Four Corners

If none of the
above options worked for you, you would need to search for yourself.
The best place to start is inside the fridge compartment. The freezer
is never home to the filter. Look at the four corners of the interior
of your refrigerator. This includes the top right, top left, bottom
right, and bottom left. They are the most common places, though the
top right is the most common of them all.

In most cases, the filter will appear
as a cylindrical compartment, or perhaps a compartment that has a
slot with a cylinder inside. It is almost guaranteed to be white and
made out of plastic.

Look Between the Fridge and Freezer

If it also not in the fridge corners,
then you will next look between the fridge and freezer. This is not
as likely in between the doors, but rather nestled into the lining of
the fridge compartment, toward the freezer.

If you cannot find it, or you do not want to deal with the hassle, you can always contact American Appliance Repair at 800-640-9934 for help.

The post Learn How You Can Find the Water Filter in Your Refrigerator or Freezer appeared first on American Appliance Repair.

Can You Put Pots And Pans In The Dishwasher? Dishwasher Repair Experts Answer

The dishwasher is supposed to make it easy to clean your cookware, but you should be conscious of the utensils you put in your dishwashing machine.

If you have pots and pans you would like to clean, you must be asking, can you put pots and pans in the dishwasher? According to dishwasher repair professionals, this depends on the type of material used in making the pots and pans.

Copper pots and pans

If your cookware is made from copper, you should avoid putting it in the dishwasher as you risk tarnishing the pot’s color and shine. To maintain the look, wash the copper pots and pans by hand.

Has your pot acquired a burnt bottom? Sprinkle some salt on the affected area and cover it with white vinegar. Let the mixture sit for fifteen seconds then proceed to scrub.

Stainless steel pots and pans

Experts report that it’s safe to expose your stainless steel pots and pans to the dishwasher, but you need to exercise some caution. Dishwashers come with excessive humidity that can corrode the metal, but when you wash with hand, you can control it as you can control the water temperature.

So when you are handling stainless steel pots and pans, you are better off washing the cookware by hand. Only consider using the dishwasher if the manual says you can safely do it.

When using the dishwasher, ensure there is enough space between the pots and other items inside to prevent scratching. Enough space also ensures the dishes get properly cleaned and dried.

Aluminum pots and pans

It’s always wise to avoid cleaning the pots and pans using the dishwasher, but if you go through the manufacturer’s manual and it says the units are dishwasher safe, you should go ahead and wash them in the appliance.

When cleaning the pots and pans, remember that the aluminum material has the propensity to scratch, so you should remove all the cookware and cutleries before you begin a dishwasher cycle.

You should note that when you regularly clean the aluminum pots and pans using the dishwasher, it’s common for the pots to develop a dull finish. To retain the gleam for a long time, alternate it with handwashing from time to time even if the manual says its dishwasher safe.

Non-stick pots and pans

It’s a common practice for manufacturers of non-stick pots and pans to recommend the dishwasher for cleaning their pots and pans. While this is the case, many homeowners have reported that the process is too tough for the pots and pans, so you are better off avoiding it.

The best way of keeping the pots and pans in top shape is to wash them by hand with a small amount of soap. When you do this, you ensure the pot retains some oil, which keeps the pans non-stick.

In addition to the pots losing their non-stick quality, they also hold a lot of odor, which is unpleasant.

During a dishwashing cycle, the pots tend to knock every item around, and this has been shown to loosen the handles.

Cast iron pots and pans

For a long time, cast iron pots and pans have been considered as dishwashers unsafe, so you should never put them there. The interior of the dishwasher can be hot as well as wet, which isn’t good for the cast iron cookware.

When you put the pots in the dishwasher, you wash away the protective coating leading to rust. To avoid this, you should wash your pots and pans by hand.

What should you put in the dishwasher?

As you have seen, the pots and pans you put in the dishwasher depend on the material used in making them. To ensure your appliances are safe, scrutinize the manufacture’s manual.

To ensure the dishwasher gives you an excellent service, keep it in top shape. This calls for you to clean it regularly. You also should regularly inspect it for any flaws and fix if present.

Sometimes even dishwasher safe pots and pans get damaged, so to keep your appliances in good condition, appliance repair Springfield professionals recommend you clean them by hand.

While this will take most of your time, it will preserve the lifespan of the pots and pans.

The post appeared first on Express Appliance Repair

The Truth about Washing Machine Detergent: Which One is Right for Your Washer’s Needs?

The Truth about Washing Machine Detergent: Which One is Right for Your Washer’s Needs?

Determining which laundry detergent is
best for your home can feel impossible. Should you use liquid
detergent? A gel tab? Or liquid detergent? How much do you use? The
answer is that it depends on your machine and several other factors.
When you work with American Appliance Repair for help
with your washer and dryer
, we can tell you exactly what type of
detergent to use. You can also keep reading to learn some of the
factors that go into finding the right detergent.

How Does Your Washing Machine Load?

One of the most important factors in
determining the right detergent is how you load your machine. A
front-loading washing machine generally needs a different type of
detergent compared to a front-loading unit. Those that are made for
top-loading machines are made to be more efficient in a high-water
environment. It creates quite a bit of foam, which is great for top
loaders but could damage a front loader.

Using the Right Amount of Detergent is Essential

To get the best results, you want to
use the detergent in the right way and add the correct amount. If you
use too little detergent, then you will not get the results you want.
Dirt and hard water deposits may also build up within your machine.
If you use too much detergent, you will be wasting money and
increasing the chance that the clothes will not rinse enough.

When determining how much soap to use,
you should think about how hard your water is, how dirty your
clothing is, and what type of washer and dryer you have.

How to Dose for Top Loaders with Powder and
Liquid Detergent

If you are using powder in a
top-loading washing machine, add it to the machine bowl or down the
middle of the agitator and do it before you put your clothes in. If
you are using liquid detergent, follow the directions as indicated on
the cap and pour it in the same place as you’d put powder
detergent. You will then add your clothes. You should never put
liquid or powder on top of clothing in a top loader.

How to Dose for Front Loaders and High-Efficiency
Washing Machines

If you are using
a powder, add it to the dispensing drawer, add your clothing to the
machine, and press start. If you are using liquid detergent, pour it
into the dispensing drawer (or use a dosing ball if included) and put
the clothing in and start the machine.

If you notice that your clothing is not getting as clean as they used to be, it could be that your washing machine is in need of repair or maintenance. Contact American Appliance Repair at 800-640-9934 for the help you need.

The post The Truth about Washing Machine Detergent: Which One is Right for Your Washer’s Needs? appeared first on American Appliance Repair.

Dishwasher Repair: Factors To Consider When Installing A Dishwasher

appliance repiar

Are you looking to install a dishwasher in your home or place of work? There are plenty of factors you should consider to install it properly. Some of these things, as given by dishwasher repair professionals, include:

Water supply

For the dishwasher to function optimally, it needs hot water. The closest source of water is under the sink. Replace the shutoff valve with a new one that connects both the sink and dishwasher to the hot water line.

The new valve, also known as angle stop, will have a vertical outlet supplying hot water to the dishwasher. You should use a long braided wire hose for connection. You can find the hose from hardware stores, supply homes, or home centers.

Remember, you may have to drill a hole in the side of the cabinet to route the hose from the shutoff valve to the dishwasher opening.

Drain line

Most dishwashers come with a hose used to connect them to the drain under the sink. Usually, the hose is connected to an inlet in the garbage disposal. Since you don’t have one and don’t want one, you will need to do simple plumbing.

Water empties from the sink through a strainer and into a tailpiece connected to a p-trap and then into a waste line. To connect the drainpipe hose, replace the straight tailpiece with a tailpiece that resembles a “Y.” Secure the drainage hose to the “Y” with a hose clamp.

Depending on the local plumbing code, you may have to install an air gap in the countertop. This will require you to cut a hole in the tile with a diamond-tipped hole saw that is attached to a drill.

If you don’t have an air gap, you can accomplish the same by securing the drain line with a clamp at the top of the sink cabinet.

Cabinet space

Standard under-counter dishwashers are 24 inches wide, 35 inches high, and 24 inches deep, and they often come with adjustable legs. You need to ensure you have enough cabinet space to fit your appliance. Before you head to the stores, take accurate measurements of the available space, and buy the appropriate appliance.

Power

Local codes require a dishwasher to be on a separate circuit that may be shared with garbage disposal. The size of the wire and circuit breaker depends on the load the dishwasher draws.

To be safe, use a 12-gauge wire run to a duplex plug and protect it with a 20-amp circuit breaker. If the electrical box is mounted on the surface, use armored cable to run the line.

Tips to consider when installing the dishwasher

For you to get the most from the dishwasher, you need to consider several tips. Some of these tips include:

Have the necessary tools

You can’t properly install the dishwasher if you don’t have the right tools, right? Some of the tools you need include: screwdrivers, pipe joint compound, electric appliance cord, wire connectors, and dishwasher connector kit.

Prepare the new dishwasher.

You can’t install the new dishwasher without first preparing it. Begin with screwing on the water valve. This calls for you to wrap the 90-degree fitting twice with Teflon tape and screw it into the new water valve.

You should then tighten it, aiming the elbow as on the old machine.

You should then attach the drain line by threading the new dishwasher drain line into the sink base cabinet. You should loop the line higher than the inlet arm on the sink drain or garbage disposer, then slip it on and tighten the clamp.

Once you are done, adjust the feet of the dishwasher. Lay the dishwasher water supply line, drain, and electrical line flat on the floor then measure the height of the opening. You should then adjust the wheels and feet according to the manual.

Properly hook up the dishwasher and reconnect it.

After setting the dishwasher, slide it in by grasping the sides of it and lifting it slightly and roll it into the opening. To avoid damaging the floor, protect it with tarp or cardboard. Once in place, align it, so it’s flush to the cabinet. Appliance repair Alexandria professionals advise you also level it with a wrench until the appliance is level and plump.

The post appeared first on Express Appliance Repair

This website nor its owners are an actual service provider, this website is a referral service. When you place a phone call from this website, it will route you to a licensed, professional service provider that serves your area. This website may receive compensation for referrals. For more information refer to our terms of service.

© Appliancerepairnearme.cc

(877) 959-3534