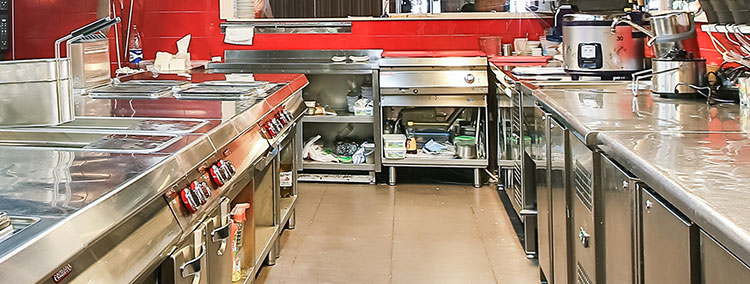
How to Get Better Cooling from Your Refrigerator

How to Get Better Cooling from Your Refrigerator

The purpose of the fridge is to keep the food cool so that they last for a long time. Unfortunately, you can’t keep the food cool if the refrigerator isn’t cool. The good thing is that you can do several things to keep the appliance functioning at its best. Some of these things, as given by appliance repair professionals, include: 

Ensure the rubber seals are in top working condition

Although this vital plastic lining is essential for ensuring your appliance performs smoothly and efficiently, it is occasionally disregarded.

This seal, also known as a gasket, keeps undesired heated air out of your refrigerator. As the doors are repeatedly opened and closed, it is normal for gaskets to wear and lose some of their suction. While your refrigerator can run smoothly for years, your gasket will likely degrade or tear after only a few years.

As this critical sealer wears out, your unit must work harder to keep your food refrigerated, resulting in increased energy bills and a shorter lifespan.

You should regularly check the seals and ensure they are always in good working condition. To do this, insert a dollar note between the fridge door and the door seal. You should do this at several spots around the door edge.

If the dollar bill rolls easily, it’s time to change your seals. Of course, you should install high-quality seals that will keep as much air in and last for a long time. 

Keep the fridge door closed.

This is the most obvious—and cheapest—way to lower your energy consumption, regardless of your refrigerator type. Standing in front of an open fridge may increase your energy bill significantly.

As cold air escapes from your appliance, more energy is required to return it to its original temperature. Decide what you want from the fridge before opening your refrigerator or freezer doors. 

Making decisions before opening your fridge allows you to limit the number of times you open it daily, which saves a significant amount of electricity and keep the refrigerator cool. 

To decrease energy usage and maintain optimal temperature levels within the fridge, keep the fridge door open for the shortest time feasible. The longer the fridge door is left open, the warmer air enters the refrigerator, raising the temperature and potentially spoiling perishable products.

As mentioned, you should only open the fridge door when necessary and grab products as quickly as possible. This calls for you to have a clear idea of what you need before opening the door and organizing your fridge’s contents in a way that allows simple access. 

When collecting or placing goods inside the fridge, keeping the door open for 30 seconds to a minute is best. Remember that optimal refrigerator use can contribute to energy savings while preserving the quality and safety of your stored food.

Make use of indoor water and ice.

Rather than opening the freezer door to obtain some fresh ice cubes or a bottle of water, utilize the in-door feature to limit the number of times the doors are opened. This easy procedure can quickly enhance the efficiency of your appliance, saving you money and prolonging the unit’s lifespan.

If your refrigerator lacks an ice dispenser, consider purchasing a countertop portable ice maker. This useful device allows you to obtain ice without opening your freezer door.

Always cool off your leftovers.

Even minor details can save you significant money on your next energy bill. Allowing leftovers to cool after a meal helps to reduce the amount of heat added to the interior of your appliance. 

You should also store your food correctly in a protective wrapping or Tupperware before placing it in the refrigerator to prevent residual heat from escaping into your unit. While this is a good move, remember to be careful not to leave your food to chill for too long, or it will spoil.

Set the temperatures at optimum levels.

You should set the refrigerator to 37 degrees Fahrenheit and the freezer to 0 degrees Fahrenheit. Anything cooler causes your fridge to work harder, consuming more energy. 

Many refrigerators do not allow you to control the temperatures precisely—and even with digital screens, temperature settings are not always accurate. 

For peace of mind that you have set the right temperature, purchase a fridge thermometer to help you determine the true temperature of your refrigerator.

Keep your fridge full.

Some people think a full fridge is warmer, but this isn’t true. A full refrigerator requires less air to keep cool and hence does not have to work as hard as an empty one.  

When your fridge is full, the items help keep each other cool when adequately loaded. 

For the best outcome, keep your fridge at least two-thirds full. 

If your refrigerator is too large, place water jugs in each compartment. 

While you should keep your fridge full, take care to fill it sparingly. Remember that good airflow is essential for effective refrigerator performance. Also, keep an eye out for air vents and make sure nothing is blocking them.

Organize your fridge

Refrigerator repair Alexandria professionals recommend using your inner neat freak and arranging your refrigerator’s and freezer’s interior. When your things are easy to find inside your refrigerator, you may spend less time with the door open looking for them, minimizing the energy you use.

You should also consider limiting the number of goods on your refrigerator’s top shelf, particularly large bread products, food boxes, or serving dishes.

This prime area in your refrigerator should be reserved for your most frequently used items. The easier it is to grab them, the faster the door closes.

Furthermore, heavier objects on top of your appliance may trap heat inside your unit, forcing your compressor to work harder to overcome and ultimately costing you more money in the long run.

A good rule of thumb is to always place what you regularly use closest to the door. This way, you can be sure you will easily reach it when needed.


The post How to Get Better Cooling from Your Refrigerator first appeared on HVAC Repair, appliance repair. The post appeared first on Express Appliance Repair

How To Insulate Your Water Heater

water heater repair

Do you want to save money on your energy bills? You should undertake water heater insulation. When your water heater is properly insulated less heat is lost in the air. This results to the water getting hot fast thus saving you power.

How To Insulate The Water Heater

You should measure your water heater in order to determine the size of faced fibreglass insulation that you should buy. You should also remember to buy duct tape to attach the insulation.

You should cut the insulation into tiny strips and wrap them horizontally around the water heater. You should use the duct tape to join the insulation strips.

To be able to control the water heater even while insulated you should cut out holes for the controls and faucets. You should leave at least 2 inches of exposed area around the flue collar. You should also keep the burner access free from insulation.

To ensure that the water heater is properly insulated you should carefully tape around any unsealed edges of the fibreglass.

Once you are through you should set the thermostat between 120-130 degrees. Any temperature higher than this will overheat the wires thus damaging your heater.

Water heater experts recommend that you should place a piece of rigid insulation under your water heater in order to save more on your power bills.

Helpful tips

Although, you can insulate your water heater if you have the right skills, it’s highly discouraged that you insulate the water heater if you have never done it before. For your water heater to be properly insulated, you should hire the services of certified water heater insulation professional.

When buying the insulation material you should be cautious and ensure that you buy it from a reputable home improvement store. To buy the insulation material at a lower price you should make your purchase during the warm months of the year.

When you are installing the insulation you should be cautious that you don’t cover the flue on top. You should also avoid covering the top of the water heater. You should remember that the insulation is combustible; therefore, you should keep it away from frame sources.

In addition to installing the insulation material on your water heater you should ensure that you regularly clean your unit. When it develops problems, you should ensure that it’s fixed by a water heater repair professional.

The post How To Insulate Your Water Heater first appeared on HVAC Repair, appliance repair. The post appeared first on Express Appliance Repair

How To Trooubleshoot An Electric Water Heater

water heater repair

Electric water heaters are a must have at home. The unfortunate thing is that they tend to develop problems. Hiring an electric water heater repair professional is good, but it takes time to find a good one and it’s usually expensive. Due to this, it’s wise that you learn how troubleshoot your electric water heater.

Electric water heaters tend to develop three main problems: lack of function, smelly water and loss of hot water.

Lack of function

This is when there is no electrical current reaching the water heater. You should start by taking a look at the circuit breaker and ensure that it’s on the “on” position. If it’s in the on position and still not working, you should take a look at the thermostat terminals marked “L1” and “L2.”

To have an easy time, you should use a voltage meter that will help you in knowing whether current is reaching the terminals.

Smelly water

Smelly water is another water heater problem and it comes from the decay of the anode rod. The rod is usually placed inside the water heater in order to prevent the tank from corroding. Bacteria accumulate on the rod thus causing the water to smell bad and have bad taste.

To troubleshoot water heater problem you should remove all the water from the tank and wash it with a solution of 3% peroxide. You should allow the solution to sit in the tank for two hours and then remove it.

Loss of hot water

There are many factors that can bring about this problem. For example, the problem can be brought by a faulty valve, wear and tear, and thermostat and heating element problems.

If the problem is coming from a faulty valve you should replace it. A clear sign that the problem is as a result of wear and tear is the flickering or non-functioning for the pilot lights.

You should take a look at the thermostat and heating elements and ensure that power is reaching them. If power isn’t reaching them, you should carefully remove the wires to the heating elements.

Conclusion

These are electric water heater troubleshooting tips. If you do all of the above and the problem doesn’t go away, you should seek water heater repair services. Here you only need to contact a water heater repair professional who will repair the equipment for you. You should note that there are some water heater problems that can’t be repaired; therefore, you need to buy a new electric water heater.

The post How To Trooubleshoot An Electric Water Heater first appeared on HVAC Repair, appliance repair. The post appeared first on Express Appliance Repair

Tips to Keep Your Refrigerator Clean and Organised

Virginia Refrigerators Repair

Refrigerator organization is critical for preserving freshness, reducing waste, and optimizing storage space. Thankfully, you can easily organize your fridge. To help you out, here are tips given by refrigerator repair professionals that you can use to turn your fridge into a well-organized environment that keeps your food fresh and conveniently accessible:

Use clear containers

Clear containers and clever storage solutions increase fridge organization and visibility:

You should invest in transparent containers that allow you to see what’s inside without opening them. They also help to keep odors at bay and improve the shelf life of stored food.

You also should consider using stackable containers to conserve space and keep your fridge organized. Stack containers of similar sizes together to increase vertical storage space.

It’s also a good idea to go with drawer dividers or organizers that help you separate fruits, vegetables, and deli goods. They reduce cross-contamination and make specific things more accessible.

Pay attention to the temperature zones.

Temperature zones differ in different parts of the fridge. For an optimally functioning fridge, you must understand and use these zones properly.

Due to frequent temperature variations, the door shelves are the warmest portion of the fridge. This area should be reserved for condiments, beverages, and goods with longer shelf life, such as pickles or sauces.

Temperatures are stable on the top and middle shelves. This is the best place to keep leftovers, ready-to-eat foods, and goods that require easy access.

The bottom shelves and drawers are colder and have more consistent temperatures. Store perishable things such as dairy, raw meats, and fish here.

Store just what is enough.

Overcrowding the refrigerator is a typical mistake resulting in poor air circulation and uneven cooling. To avoid this, follow these guidelines:

Maintain a suitable capacity: You should leave enough space between the various products for proper ventilation. Avoid stuffing too much food into the fridge.

Organize comparable items: Organize your refrigerator by food types, such as dairy, vegetables, fruits, and meats. This arrangement makes it easy to find products and prevents overpopulation in specific places.

Improve shelf height: If your fridge allows, adjust the shelves to fit food products of varying sizes. An excellent way to go about it is to use adjustable shelves or remove a shelf to generate more vertical space if you have taller products such as bottles or pitchers.

Observe the first in, first out rule.

Follow the “first in, first out” rule to reduce food waste and ensure freshness. If this is the first time doing it, here is how to go about it:

Prioritize older things: When unpacking groceries or keeping leftovers, store older products near the top of the shelves or in easily accessible areas.

Label containers and shelves appropriately: You should mark the date you prepared or purchased food. The best way to mark the foods is by using detachable labels or masking tape. Doing this lets you track the food products and readily identify foods that should be consumed sooner.

Store the fruits and vegetables properly.

Improper fruit and vegetable storage can hasten rotting. Follow the following guidelines:

Separate fruits and vegetables: Some fruits emit ethylene gas, accelerating ripening and causing surrounding veggies to decay faster. Separate them or use ethylene-absorbing materials like produce storage bags or containers.

Make use of humidity drawers: Most refrigerators contain humidity-controlled drawers. Adjust the settings accordingly to maintain the optimal humidity levels for fruits and vegetables. Leafy greens want high humidity, while fruits prefer low humidity.

Properly use the fridge door.

Because the fridge door is prone to temperature swings, it is not ideal for storing perishable foods. Here’s how to make the most of your refrigerator door:

Keep products on the door shelves: Store frequent items, dressings, and sauces on the entryway shelves. These have a longer shelf life and are more temperature resistant.

Place clear, stackable containers or caddies on the door shelves to keep little objects tidy. You can store individual yogurt cups, cheese sticks, or miniature bottles here.

Keep dairy and eggs away from the door. The temperature on the door swings greater than in the rest of the fridge, which might lead to spoiling. Place dairy items and eggs on the interior shelves for optimal temperature control.

Regularly clean the fridge.

Cleaning and maintaining your refrigerator regularly is essential for both hygiene and organization. For a clean and properly maintained fridge, consider these tips:

Regularly inspect your refrigerator for expired products or food that has gone bad. Dispose of them as soon as possible to avoid unpleasant odors and cross-contamination.

Spills or leaks should be cleaned up right away. Wipe out shelves, drawers, and interior surfaces with a moderate vinegar-water solution or a light all-purpose cleaner.

Every few months, empty the fridge completely and properly clean all surfaces. To wash shelves and drawers individually, remove them. This technique aids in the preservation of a clean and sanitary atmosphere.

Other tips to have your fridge clean and organized

Use refrigerator bins: You must invest in various-sized bins to create distinct storage sections within your refrigerator. These bins allow you to store snacks, deli meats, and already-prepared meals. Placing the food items in bins also makes them easy to access.

Make use of lazy Susans or turntables: you need to place a lazy Susan or turntable on shelves to make it easier to reach stuff at the rear. To reach items, simply rotate the turntable without upsetting the arrangement.

Use door-mounted racks: To maximize vertical space, install door-mounted racks or organizers. These can store spices, small jars, or beverage cans.

Freeze the herbs: freezing the fresh herbs extends their life. All you need to do is cut them into small sizes and freeze them in ice cube trays with water or oil.

Label shelves and sections: Think of labeling shelves and sections with specific categories like “Snacks,” “Leftovers,” or “Meal Prep.” According to appliance repair Fairfax professionals, doing this makes it easy for family members to know where to place different items. It also helps to keep things organized.

The post Tips to Keep Your Refrigerator Clean and Organised first appeared on HVAC Repair, appliance repair. The post appeared first on Express Appliance Repair

How To Take Care And Repair Ceramic Cooktop

ceramic cooktop

Do you have a ceramic cooktop in your home? You should take good care of it for it to last for a long time. If you don’t know what to do, here are tips that you should put into consideration:

How To Take Care Of Ceramic Cooktops

When cleaning the cooktops you should never use abrasive cleaners or metal pads which can easily scratch them. Instead of using these cleaners, you should use a soft sponge, clothes and creams that are designed for ceramic cooktops.

If you cook with pots, you should be careful that you don’t drag them on the cooktop.

Sugary substances can discolour your cooktop; therefore, you should be cautious that they don’t land there thus leaving yellowish areas that are impossible to remove.

You should also not place a hot glass bakeware on the smooth cooktop.

How To Repair A Ceramic Cooktop

Although, you might be taking good care of your cooktop, accidents do happen. For example, the ceramic cooktop might get chipped. When this happens you should repair the damaged cooktop.

There are two ways in which you can repair a chipped ceramic cooktop: with the chipped piece and without the chipped piece.

To repair using the chipped piece you should clean the chipped area in order to prepare it for the chipped piece. You should use a ceramic epoxy adhesive in order to glue the piece back into place. For the pieces to stick together, you should apply some pressure on them. After you have replaced the chipped piece you should protect the area with a ceramic sealer and let the area dry for 24 hours.

If you want to repair the area without the chipped piece you should mix the filing compound from the ceramic repair kit. As rule of thumb you should follow the given mixing instructions. Once the mixture is ready you should use a flat edged tool to spackle the filler compound into the chipped area. If there are rough areas you should smooth them with steel wool. You should then wipe the area, seal it and allow it to dry.

Conclusion

These are tips on how to take care and repair a ceramic cooktop. If your cooktop is damaged and you don’t have the skills to repair it, you should hire the services of a ceramic cooktop repair professional to help you out.

The post How To Take Care And Repair Ceramic Cooktop first appeared on HVAC Repair, appliance repair. The post appeared first on Express Appliance Repair

Tips On How To Take Care Of Fridge Freezer

fridge freezer repair

Freezers are very useful in a fridge as this is where you keep beef, chicken, cream and other foods that require very low temperatures to remain fresh. For you food to remain fresh for long you need to take good care of your freezer. Here are tips on how to take care of the freezer:

Clean regularly

Cleaning the freezer regularly not only maintains its elegant look for long, it also improves its functioning. To clean the freezer you should first empty it and remove any food debris that might be there.

In addition to cleaning, it’s also wise to disinfect the freezer at least once a month. For ideal results you should use a 50:50 mix of warm water and white vinegar. This mix will not only disinfect your freezer, it will also aid in cleaning stains and removing frost.

Maintain the coils

Coils are the prime causes of refrigerator problems. They are usually located at the back of the fridge and transfer the coolant. When they are covered with a lot of dust and pet hair they tend to overheat.

Although, most of the fridges require that you check and clean the coils once a year, side-by-side models require that you maintain them twice a year. When they stop working you should contact a freezer repair expert to take a look at them.

Never overstock

This is a no brainer, but many people tend to overstock their freezers when they have many things that they need to be frozen. You should note that overstocking the freezer prevents the food from getting cooled adequately which often results to food spoilage.

An overstocked freezer is also a great threat to the vents. When food is too full in the freezer, it packs itself against the vents. This not only prevents adequate air flow, it also puts the freezer vents at the risk of damage.

Maintain the door seal

Door seals are prone to mould. When a lot of mould accumulates on the seal, it results to distortion which brings about leakage of cold air. You should regularly clean the seals and if you notice a flaw, you should replace them as soon as you can.

Conclusion

These are tips on how to take care of the fridge freezer. If you need to repair the freezer, always ensure that the work is handled by a qualified freezer repair professional.

The post Tips On How To Take Care Of Fridge Freezer first appeared on HVAC Repair, appliance repair. The post appeared first on Express Appliance Repair

3 Types Of Water Heater Leaks

water-heater-repair

It’s common for water heaters to leak due to a number of reasons. It’s good to note that there are many types of water heater leaks with the main ones being:

Condensation leaks

They are common with gas water heaters. The problem presents itself when you put the water heater on for the first time during the cold weather. The good thing with this problem is that it disappears when the water in the tank warms up.

If you notice water pooling or dripping on or near the water heater, you should dry it up and wait for some time. If you come back and find that the area is still dry, the problem was a condensation issue.

Pipes

Loose pipes are bound to leak if they aren’t tightly fitted to the water heater. The most common area where the leak originates is at the top of the water heater where the cold water supply line and the hot water exit line connect to the tank. It’s common for a leak to develop around the anode rod fitting on the top of the tank.

In rare cases, you will find that the thermostat is the source of the leak. If you have an electric water heater, the heating elements maybe the problem.

Tank

If your water heater is old or damaged, it’s bound to leak. You should note that it’s almost impossible to repair water heater leaks on the tank body—you need to replace the water heater.

Points to remember

You should repair a leaking water heater as soon as you can in order to avoid damaging your home and health. Even a small, slow leak has the potential of damaging your floors and sub-floors. Wet floor promotes the growth of mildew and mold which is harmful to your health.

Before you take a look at the leaking water heater, you should shut off power getting into the appliance. You should also shut off the water supply.

While there are some leaks such as pipe leaks that you can repair on your own, its wise that you hire a water heater repair professional who will not only fix the leaking problem, but who will also ensure that the water heater is safe to use after repair. A water heater repair professional also ensures that the water heater problem doesn’t recur.

The post 3 Types Of Water Heater Leaks first appeared on HVAC Repair, appliance repair. The post appeared first on Express Appliance Repair

Freezer Problems And How To rectify Them

freezer problems

Freezers tend to develop problems every now and then. Here are some of the freezer problems and how to rectify them:

Improper cooling

There are many factors that can cause the freezer to cool improperly. One of the factors is leaking refrigerant. If the refrigerant lines leak the refrigerant may start to flow quickly thus cooling the freezer too fast. In some cases, this may bring about frost problems. If a lot of the refrigerant leaks out, it can cause improper heat transfer.

Malfunctioning fans can also cause the problem. You should open the containing box and confirm if the fan blades are intact and unfrozen. If the fan has frost, you should use a hair dryer to defrost it. You can also use oil to loosen up the fan.

Freezer quits working

In some cases, the freezer can stop working. There are many factors that can trigger this. One of the factors is electrical problems. The electrical problem can be a blown fuse that creates power outage that blocks flow of electricity to the freezer.

The problem can also be a damaged power chord. The chord causes inconsistency in the supply of electricity. To undertake freezer repair you should take a look at the fuse and if it has blown you should replace it. If the power chord is damaged and you don’t have the skills to repair it, you should hire the services of a professional.

Mechanical problems can also cause the freezer to stop working. If you don’t hear noise from the back of the freezer, the motor may have failed.

Dirty condenser coils can also provoke the freezer to stop working. Condenser coils are metal coils that run zigzag across the back of the refrigerator and often fail working properly when they are dirty. You should look at them and confirm if they are dirty. If they are dirty, you should clean them using a brush and then return the back panel. You should note that mechanical repairs are very sensitive; therefore, you should leave them to the professionals.

Conclusion

These are some of the common freezer problems and how to correct them. As mentioned, you should avoid repairing the freezer if you don’t have the right skills. As rule of thumb you should let a qualified freezer repair professional to handle the work.

The post Freezer Problems And How To rectify Them first appeared on HVAC Repair, appliance repair. The post appeared first on Express Appliance Repair

8 Mistakes You are Making with Your Dishwasher

A dishwasher is one of the most commonly used kitchen appliances, and it saves you time and effort when dishwashing. 

To keep your dishwasher running smoothly, you must avoid making dishwasher mistakes that households make daily.

The mistakes you should avoid, as given by appliance repair professionals, include: 

You don’t read the instruction manual.

Many people have the impression that every dishwasher is the same. Due to this, they don’t bother reading the manual for their specific model as they think it’s unimportant.

Each dishwasher has a slightly different set of needs and ways of working.

One example is the type of things that each device can handle. When you don’t read the owner’s manual before using the appliance, you won’t know the items you can clean using the unit and those you can’t.

To stay safe, read the instructions before putting the different items in the dishwasher. 

Don’t put anything in the dishwasher if the manufacturer doesn’t say that it can go in.

Failing to run hot water beforehand

You might miss out if you don’t run your hot water tap before using the dishwasher. This might sound strange, but it’s true.

Running hot water before you start to use the dishwasher can ensure that the water going into the dishwasher is already hot, which can help it clean better.

Cold water can leave behind leftover soap and food. To stay safe, turn on the hot water at the sink and let it run for a few minutes.

Failing to leave the door open after a cycle

Just like with a washing machine, you should leave the dishwasher door open after using it so it can dry properly.

This is a great way to avoid mold, especially on the caps.

While this is a great practice, in most cases, many homeowners don’t do it often because they don’t know it’s the right thing to do. Others don’t know that they should do it. 

To stay on the good side, make it a habit to leave the dishwasher door open after running a cycle.

Overusing the eco mode

Eco mode or energy saver mode on your dishwasher can only be good for you and your appliance, right? Well, this is not true. Even if the mode saves energy by running at lower temperatures, setting your dishwasher to only run on eco mode could be a mistake that could hurt you in the long run.

Some people only use the eco or energy saver mode on their dishwashers because they think it would save them money and be better for the environment. Unfortunately, this isn’t always the case.

Running your unit only on eco mode could cause problems because the water might not get hot enough to dissolve all the soap. Soap can build up over time, leading to problems like leaks and damage to the dishwasher.

To prevent this, occasionally use the dishwasher’s highest temperature setting to keep it clean and ensure soap doesn’t build up.

Overloading the dishwasher compartments

One of the most common mistakes homeowners make when using their dishwashers is to put too many dishes, pans, glasses, and silverware in them.

Why does this matter so much? If you put too many things in your dishwasher, it won’t clean as well as if you left more room between them. Overloading your dishwasher can make your dishes have a foul smell and less clean.

To avoid this, load your dishwasher correctly, leaving enough space between the dishes so the water and soap can move around properly during the cleaning cycle.

Failing to clean the dishes

Some experts advise that you don’t need to clean your dishes before putting them in the dishwasher, but this is controversial.

You should know that your dishwasher isn’t a trash can or a garbage disposal. This means that you shouldn’t allow all the trash to get there. 

One of the biggest mistakes you can make when using the dishwasher is failing to scrap off bigger bits of stuck-on food or sauce, as these leftovers could linger.

Even though dishwashers are made to clean dishes, you should still scrape and rinse dishes before putting them in the dishwasher. If you don’t do this, bits of food will get stuck in your dishwasher and won’t clean your dishes.

This means you’ll have to clean your machine more often in the long run.

You don’t need to pre-rinse your dishes, but you should scrape off any stuck-on food. This way, you have fewer food particles getting into your dishwasher. 

Failing to clean the filter

It’s easy to forget or not even know that the dishwasher has a filter, but it does, and it does a great job of keeping your dishes clean by filtering out dirt and waste.

A dirty filter could be why your dishes come out of the washing with a film on them, and your glasses look cloudy.

Because of this, you need to clean it regularly. How often you clean it will depend on how often you use your machine. Once a week is suitable for some homes, but once a month is good for others.

You should research and find out the best time to do it. It also doesn’t hurt to consult an experienced dishwasher repair Springfield professional.

Failing to clean the dishwasher deep

Even though you should clean the filter often, you should also deep clean the dishwasher every so often.

You can do this by running a dishwasher cleaner or a bowl of white vinegar on the bottom shelf while the dishwasher is empty.

Doing this eliminates the limescale, food, and grime that have built up in your dishwasher.

It will keep your dishwasher from getting smelly, make sure your dishes get clean, and make the machine work better.

For the best outcome, deep clean your appliance at least once a week. You can do the cleaning yourself, but if you don’t have the time or aren’t sure about your skills, let an expert do it.

The post 8 Mistakes You are Making with Your Dishwasher first appeared on HVAC Repair, appliance repair. The post appeared first on Express Appliance Repair

Common Problems With Electric Ovens

oven repairHas your electric oven stopped working and wondering what the problem could be? Here are some of the common electric oven faults:

Power problems

When your oven has power problems, it fails to start. If there’s power in the socket and the appliance isn’t starting, the fuse may have blown. The electrical supply may also have been interrupted; therefore, you should check the main fuse board and ensure that everything is okay. If your oven has a digital timer, it might have stuck in automatic. You should reset the timer using the given instructions.

Oven has power, but not heating up

This problem is brought about by a number of factors such as faulty thermal fuse or thermal switch. It can also be brought about by a faulty oven element. You should check the two parts and ensure that they are intact. You should carefully take a look at the element and ensure that there are no broken pieces on it. If there are any pieces, you should consider replacing the element.

Oven burns food

This happens when the temperature is too high. You should check the thermostat sensing bulb and ensure that it’s intact. Sometimes, the bulb comes loose and ends up on the floor of the oven or heating element. If the bulb is in the right place, you should consider recalibrating the thermostat. Recalibration is a sensitive process; therefore, you should seek the services of a qualified electric oven repair professional.

Door and control knobs get too hot

This is common when the cooling fan is faulty or is blowing air out from the top of the appliance. You should check if your oven has a fan. If the fan isn’t working, you should replace it.

Oven door doesn’t close or has fallen off

The main causes of this problem are faulty hinges. Here the hinges might have broken or become misaligned. It’s also possible that the door seal might have perished on become loose. In this case, you only need to replace the seal.

Electric oven repair costs

Electric oven repair costs depend on the part of the oven that you want to repair. For example, if you want to replace the heating element you will need to part with $20-$30.

Conclusion

This is what you need to know about the common problems with electric ovens. To avoid problems, you should avoid undertaking electric oven repair on your own—you should hire the services of a professional.

The post Common Problems With Electric Ovens first appeared on HVAC Repair, appliance repair. The post appeared first on Express Appliance Repair

This website nor its owners are an actual service provider, this website is a referral service. When you place a phone call from this website, it will route you to a licensed, professional service provider that serves your area. This website may receive compensation for referrals. For more information refer to our terms of service.

© Appliancerepairnearme.cc

(877) 959-3534